
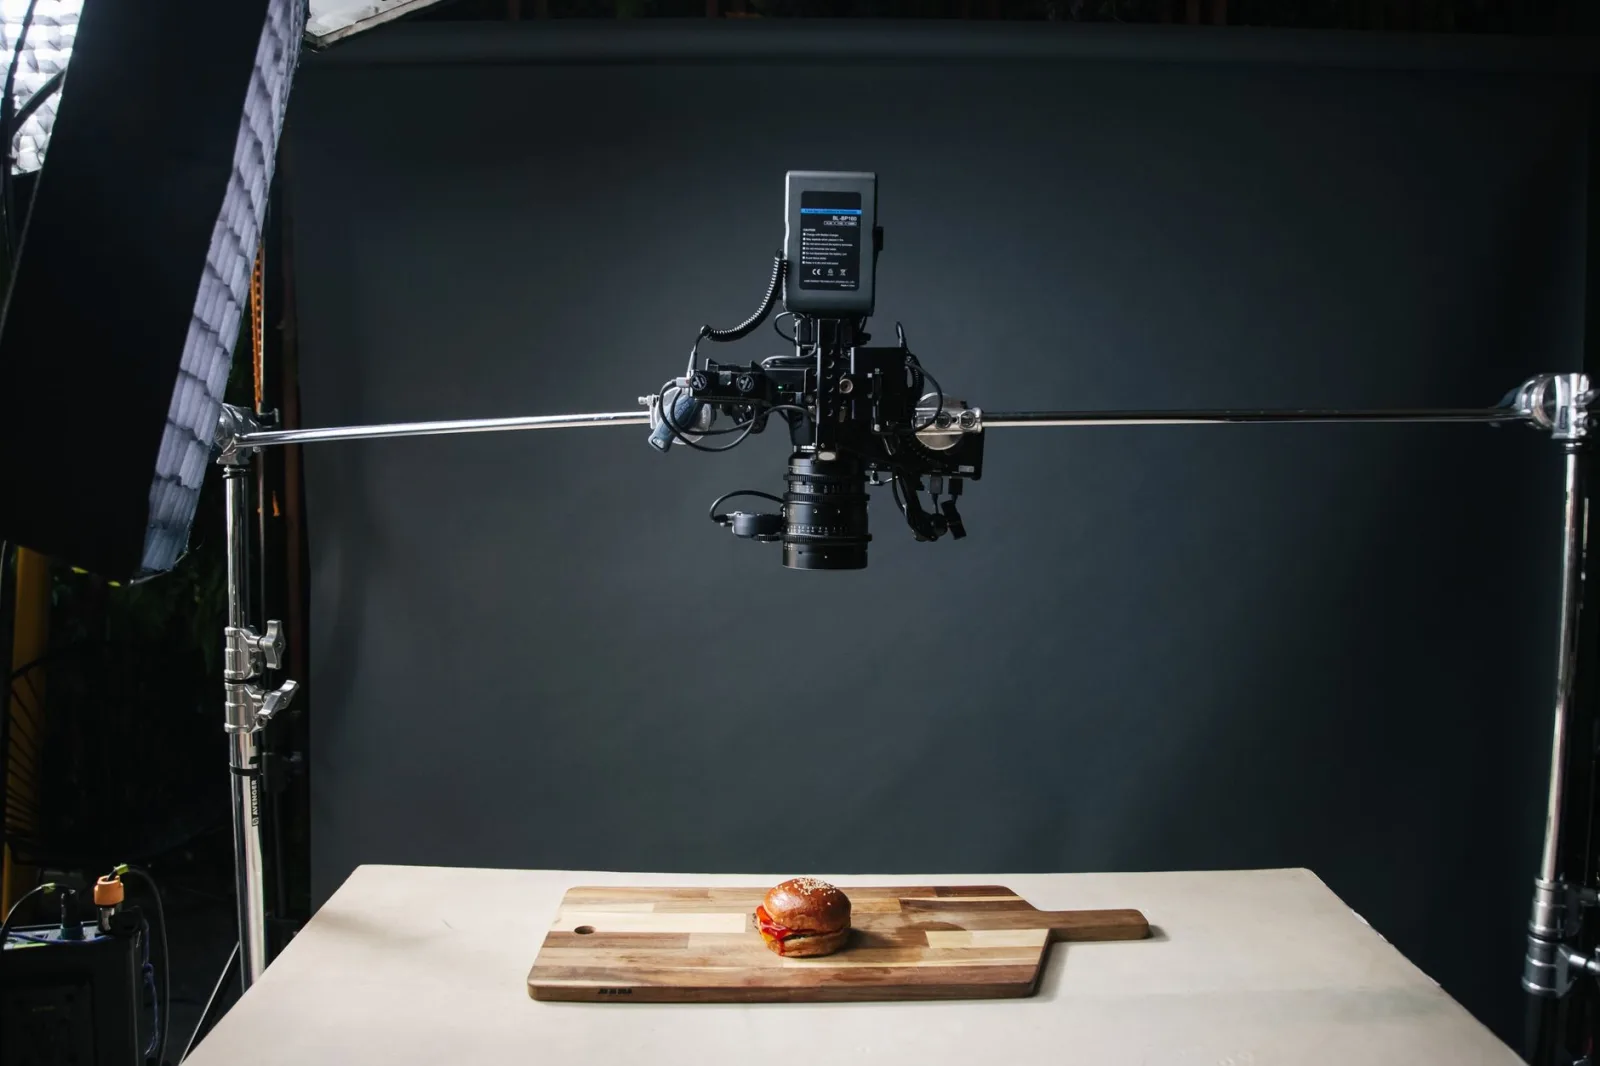
He prepared the plate carefully and arranged it, then switched on every lamp in the kitchen, raised the camera overhead and shot. On the screen the food looked pale and washed out, there was a hard black shadow under the plate, and the ring of the ceiling light was shining in the middle of the sauce. So he turned all the lamps off, carried the plate to the table beside the window, and shot from the side. Same plate, same camera, and the picture suddenly looked like it came from somewhere else.
That is the heart of filming food and products on a table: the result is decided by the direction of the light and by the angle, not by the price of the gear. In video it matters even more, because the thing you are filming does not speak and does not move, so the light and the composition are all the shot has.
The three decisions before any gear
First: which side the light comes from. Light from the front, such as an on-camera lamp or a ring light, kills texture. Bread looks flat and metal looks shapeless. Light from the side, or from behind at an angle, creates small shadows that reveal the grain: the sugar crystals, the steam off the cup, the cracks in a crust, the weave of a cloth. The practical rule is to put the window to the right or the left of the table, or slightly behind the object, and shoot from the opposite side. This is a direct extension of what we covered in Lighting in Filming: From a Single Source to Three-Point Setups.
Second: the surface and the background. Most failed food pictures fail because of what surrounds the plate, not the plate. A patterned table, a printed cloth, a kitchen visible behind: all of it pulls the eye away. What you need is a surface in one quiet colour: a wooden board, a baking tray, a piece of marble, a large sheet of neutral card. And a background with no detail: a plain wall, or card propped up on books.
Third: a camera that does not move. Any food or product shot needs a still camera, because the slightest wobble in a static scene becomes irritating at once. A simple tripod is enough, and if you do not have one, rest the camera on a stack of books.
The angle table: which angle for which object
The angle is not a matter of taste. It follows the shape of the object:
| Object | Angle | Why |
|---|---|---|
| A flat plate, pizza, soup | Straight overhead | The whole shape lives in the flat plane, and a side view shows none of it |
| A cup, a bottle, a layered cake | Table level | The height is the story, and an overhead shot erases it |
| A burger, a sandwich, a piled plate | 45 degrees | You see the top and the side at once |
| A small product: a watch, a box, a tool | 30 degrees plus one close shot | Shows the overall shape alongside a single detail |
| A hand moving, cutting or pouring | Table level or 45 | Movement reads better from the side |
In video, do not settle for one angle. A single shot held for thirty seconds becomes dull, whereas three shots of the same plate from three angles build a scene. The composition rule that governs where the object sits in the frame is covered in Composition and Framing: Where Do You Put Your Subject in the Frame?.
Gear, in the order of what it actually adds
- A sheet of white paper or foam board. The cheapest tool in this whole field. Put it on the side opposite the window and it bounces light back into the dark side and softens the shadow.
- A piece of black card. The opposite. Use it to darken one side and add volume and depth; it is the secret behind many shots of shiny bottles.
- A thin white curtain or tracing paper. If the sun is hitting the window directly, this turns it into soft light.
- A small tripod or an arm over the table. It lets you shoot overhead with a free hand.
- One dimmable lamp. This comes at the end, not the beginning, and its main value is freeing you from daylight hours.
When you do add a lamp, do not mix it carelessly with window light: the difference in colour temperature between two sources ruins the shot. The detail is in White balance and colour temperature.
Lens and focus
Table shots punish you for a shallow depth of field. Open the aperture all the way and one grain comes out sharp while the rest is lost. In these shots you are better off closing the aperture a stop or two until the whole plate is readable. Choosing the lens that suits what you film is covered in One lens or two? How to choose, and the reasons shots come out soft in Focus: why your shots come out soft.
In product shots specifically, set focus manually and lock it. Autofocus in a static scene keeps drifting between one surface and another, and the shot comes back with an irritating visual breathing in it.
Five mistakes that keep repeating on the table
- The food goes cold in front of the camera. Set up the frame, the light and the focus on an empty plate or a stand-in, then put the real plate down and shoot in the first two minutes.
- The big white hotspot. A reflection of the light source on sauce, glass or plastic. Fix it by moving the object slightly, or shifting your angle two or three degrees.
- A crowded frame. Four objects in the shot, each demanding attention. The rule: one main object, one supporting object, and empty space.
- The clipped black shadow. A sign that the light is hard and nothing is bouncing it back. A sheet of white paper on the other side solves it in two seconds.
- Neglecting sound in video shots. The sound of cutting, pouring and crunching is half the pleasure. Record it with a mic next to the object, not from where the camera is.
A short exercise
Pick one object in your house: a cup of coffee, a box, an apple. Film it five times in ten minutes: once under the ceiling light from the front, once with window light from the side, once with window light plus white card opposite, once from overhead, and once from table level. Then watch all five on a big screen.
You will find the difference between the first and the third is larger than the difference between two cameras a thousand dollars apart. That is the lesson that stops you postponing this kind of shot until you buy gear.